
Stringing Up a Homemade Christmas
Part 1: Orange and Apple Ornaments

One afternoon, as I was washing a sink full of breakfast and lunch dishes in the sunny corner of my kitchen, I noticed how the light made the soapy bubbles sparkle just so against the nutmeg-colored spoons. The simple beauty of the colors and the light, along with the heat of the water against my perpetually cold hands, made dishwashing actually pleasant. I’ve washed many dishes in my day, but as my family has moved away from plates, cups, and food storage containers made from plastic, and toward dishes and utensils made from more natural materials, I’ve noticed that the task of cleaning our tableware has become a little less tedious. I don’t know if it’s the beauty of their natural colors, or the soothing texture of glass and wood, but it’s spurred me to continue incorporating more natural materials in my home wherever I can, including in this year’s Christmas decor. Consider, for instance, dried fruit: real and yet somehow whimsical — just like Christmas.
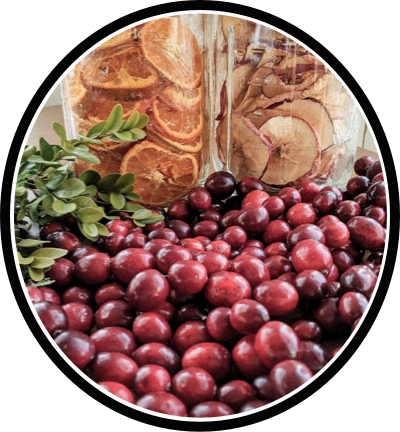
I had some apples in my basement for a while that were a little past their prime, with their skins starting to get ever-so-slightly wrinkled. I could have thrown them in a pie, but I decided that they’d probably make beautiful ornaments. They didn’t disappoint. Oranges worked well too. See instructions below. (In Part II we’ll cover cranberry and popcorn garland.)
— April
What You Need

•5-6 pounds of apples
•Water with 2 tablespoons of lemon juice
•6 pounds of oranges (I used mandarins)
•Food dehydrator (if you have one)
•Needle
•Fishing line or twine
•Optional: hot glue and ribbon
What You Do

For apple decorations, you can slice horizontally, vertically, or alternate. Apples sliced horizontally have a star in the center of the slice, but cut vertically, the slices will have their characteristic apple shape. I chose to slice mine horizontally. Slice the apples into thin slices, approximately one-third inch thick. To prevent browning, place the sliced apples in a bowl with the water and lemon juice until all the apples are sliced. Feel free to use the whole apple, even the tops and bottoms. Perfect slices can become beautiful ornaments, and any less-than-perfect ones can become a tasty snack.
Once all the apples are sliced, drain the water and pat the slices dry with a dishtowel. Arrange the slices on dehydrator trays and dehydrate at about 130°F for 12 hours. If you don’t have a dehydrator you can place slices on parchment paper on a cookie sheet in a 200°F oven for two and a half hours, or longer if needed. Once dried, thread the ornament-worthy slices with the needle and fishing line. Make a loop and tie off with a knot to hang on the tree. This simple ornament is beautiful just as it is, but if you wish to embellish it with a small bow or some boxwood leaves, a dab of hot glue works well to attach these to the ornament. You can get creative using whatever natural plant material you can forage.
For the orange slices, simply slice them thinly and arrange on the dehydrator trays. Dehydrate at 135° F for 12 or more hours (See note above for oven dehydration.) I initially dehydrated the slices for seven hours, but they were not yet ready. A full 18 hours was needed to dehydrate them completely. How long it takes will depend on the thickness of the slices and your specific dehydrator. If you are in a dry climate and have a warm house, it probably wouldn’t hurt to finish drying the slices by hanging them on the tree. If you want to store them, however, they will need to be dehydrated completely. Once dried, thread them with a loop of fishing line or twine, make a loop and tie off to hang on the tree. Feel free to embellish with a stick of cinnamon or star anise.