
Exceptionally Easy Artisan Bread

Mr. Matthew Giambrone
One day, while the pandemic was turning the world upside down, I was on a business phone call, which eventually meandered into life and lockdown. I mentioned that I was enjoying the increased bread baking occurring in our home. “How in the world did you get flour?”
It is a strange question to hear, at least in a first-world country, and it has been sobering to live through an era in which it might be heard. At the time, of course, the grocery store baking aisle was a desolate wasteland — hence my colleague’s question. But, thankfully, we had ample flour and yeast on hand, and we also had some sourdough starter going. These are good things to keep around. There is something magical and powerful about bread: Its warm presence was a pleasant, daily anchor point during those confusing days. It still is during these confusing days.
It is easy enough now to find flour and yeast, which ironically will likely correlate to a marked decline in bread making: We have many more options than we did a few months ago. But doing it anyway, intentionally, unnecessarily, is no less magical and powerful. One might even say bread is, or can become, divine. Scripture is surely rife with references. And it is fitting, to say the least, that the word Bethlehem means “House of Bread” — the apparent etymology: beth equals house, lehem equals bread.
The squishy, plastic-wrapped stuff you’ll find lining the chainstore’s bread aisle, however, makes the spark of magic more — shall we say — difficult to discern. There you are limited to, at best, one half of “wonder and awe.” If you find your way instead to the bakery section, or better yet to a bakery, you’ll be on steadier ground. And it is important that we support and encourage the development of a professional class of local bread makers, particularly for the higher bread-making arts. But for simple staff-of-life stuff (and to allow the warm redolence of yeast to perfume daily affairs) you must tend to matters yourself, in your own oven, in your own home.
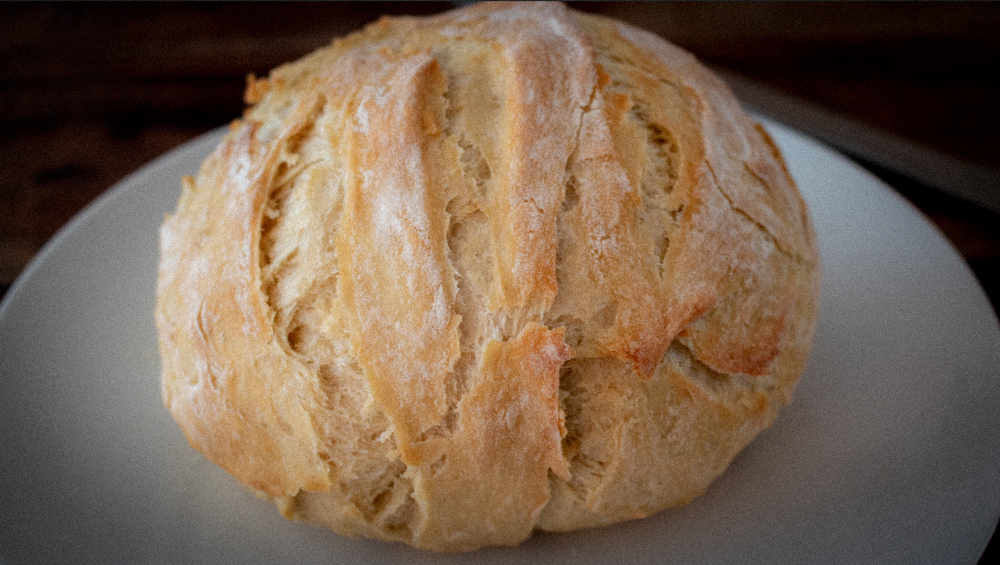
This can be exceptionally easy. And before you lies the most exceptionally easy recipe you’ll ever find for exceptionally enjoyable bread. It will rival much of what you’d buy at an artisan bakery, with very little time investment, for about one-tenth the cost. And anybody can do it. In fact, the loaf shown in the picture above was made by my nine-year-old daughter. (Granted, she’s an exceptionally talented nine-year-old.)
— Matthew
What You Need

Ingredients:
• 8 cups (960g) unbleached all-purpose flour. We use organic.
• 3 cups (680g) lukewarm water.
• 3 teaspoons (7g) instant or active dry yeast (typically one packet)
• 1 1/2 tablespoons (27g) kosher salt (preferred), or 1 tablespoon (18g) table salt
Materials:
• Large bowl
• Measuring utensils
• Optional: Wooden spoon
• Optional: Kitchen scale. (Measuring by weight instead of volume will greatly improve your results. See gram measurments. You can purchase a small digital kitchen scale for about $20; it need not be big or fancy.)
What You Do
1. Gently scoop the flour into a measuring cup and level off, creating a smooth, even top. No mounding! No pressing down! No scooping with the measuring cup – use a separate scoop! Put the flour in the bowl along with the lukewarm water, yeast, and salt.
2. Mix with a large wooden spoon or your hands until it comes together into a shaggy dough. Caution: it will be sticky.
3. Place a dampened kitchen towel, reusable fabric bowl cover, or plastic wrap over the top of the bowl and find a happy, warm place for it to rise. Leave for two hours.
4. Place bowl in the refrigerator for at least two hours, preferably overnight, or up to a week. The longer it sits, the tangier the end result. It will rise and then fall in the process of resting in the cold environment.
5. Remove from refrigerator and dust the top of the dough with flour. Grease your hands and take out half of the dough. Drop onto a well-floured surface and form into a ball or oblong loaf. Sift a bit of flour on top. Place loaf onto a parchment-lined baking sheet or into a parchment-lined Dutch oven. Cover, this time with greased plastic wrap, and place in the same (happy) warm place until the dough reaches room temperature. This will take about an hour.
The recipe makes two loaves. So you can replicate the above with the other half of the dough right away, or you can store it in the refrigerator for another day — with most the work done, you’ll have a quick path to oven-fresh bread later in the week.
6. Preheat oven to 450 degrees F.
7. Score the loaf with a sharp knife (or bread-lame) a few times. Be creative or simply cut a tried-and-true X.
8. If you have a Dutch oven, place the loaf on parchment in the Dutch oven, inside your kitchen oven. Put the lid on before baking; then remove the lid after 35 minutes and bake for about 10 more minutes. This is our recommended method.
If you do not have a Dutch oven, bake for about 40 minutes, and consider putting an open pan with water in the oven as well; steam (as naturally present in the Dutch oven method) helps form a good crust.
Regardless of which method you use, precise time may vary significantly based on your oven: bake until the crust is a deep, golden brown and the loaf sounds hollow when tapped.
9. Remove and cool on a wire rack.
10. Pull apart or cut into thick slices when you are ready to serve.
Notes:
“Lukewarm” water means about 110 degrees F. It is acceptable to just touch the water with your finger to make sure it’s the proper temperature, but if this is your first rodeo, you may want to use a thermometer. Do not use warm water straight from the tap; your hot water pipes are likely full of unpleasant stuff. Start with cold (filtered) water and heat it up.