
1. Cut down the seam of the grocery bag and cut to remove (and discard) the bottom, thus creating a large, flat, rectangular piece of paper.
2. Use a ruler and pencil to outline 16 strips: each should be 1 inch wide and 14 inches long. Cut them out. Do the same to create 5 or 6 more strips; each should be 1 inch wide and 21 inches long.
3. Fold all the strips in half, length-wise, so that each is 1/2 inch wide. Run the back of a butter knife along each strip of paper, pressing it down to make the folds tight and clean.
4. Create one more strip, 4 inches wide and 24 inches long. Fold in half lengthwise three times, so that it is about 1/2 inch wide. Repeat the butterknife exercise on this strip; you’ll have to press hard. This will be used for the handle.
5. 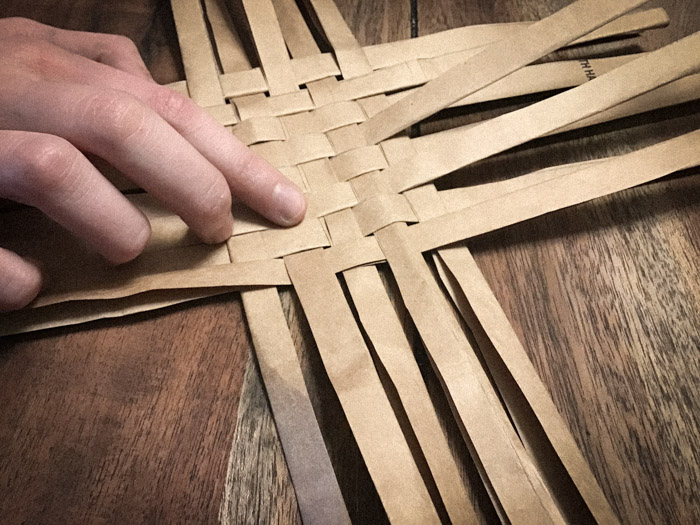 Lay 8 of the 14-inch strips together on a table, vertically, tight and parallel to one another. Now weave one of the remaining 14-inch strips horizontally, through the vertical strips on the table, alternating over and under them. Weave in another 14-inch strip next to it, alternating under and over, but such that you are now going under the horizontal strips you previously went over and vice versa. Continue until all 14-inch strips are woven together. Use paper clips as needed to help hold things in place. You should now have a square in the middle of the arranged 14-inch strips. Make sure they are packed tightly together.
6. Cleanly fold and crease the portion of the strips that extends beyond the inner square, so that the strips bend upwards at a right angle.
7. 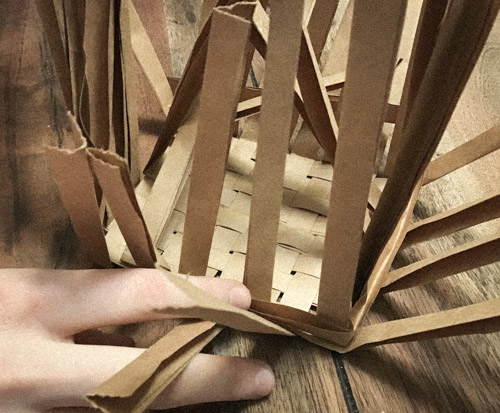 Weave one of the 21-inch strips, all the way around the permitter to begin to form the sides of the basket. Be sure to alternate over and under. Overlap and tuck in any excess once you have come all the way around the basket. Repeat with another 21-inch strip, this time going over where you previously went under and vice versa. Repeat with the remaining 21-inch strips to build the sides of the basket. Try to keep everything tight and work out any slack. This gets pretty tricky; again paper clips will be your best friends.
8. 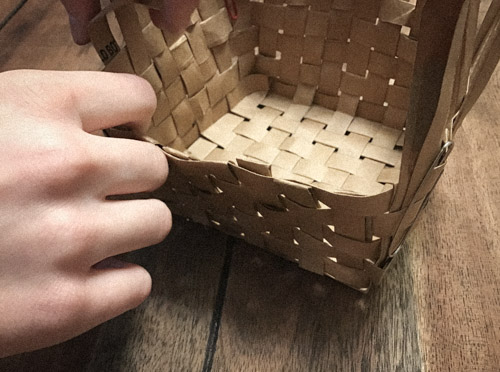 Tighten everything up as best you can. If you wish to make a taller basket, cut out and weave in some additional 21-inch strips. When you’re done, fold the overhanging portion of the 16-inch strips down and tuck them into cross strips on the inside of the basket.
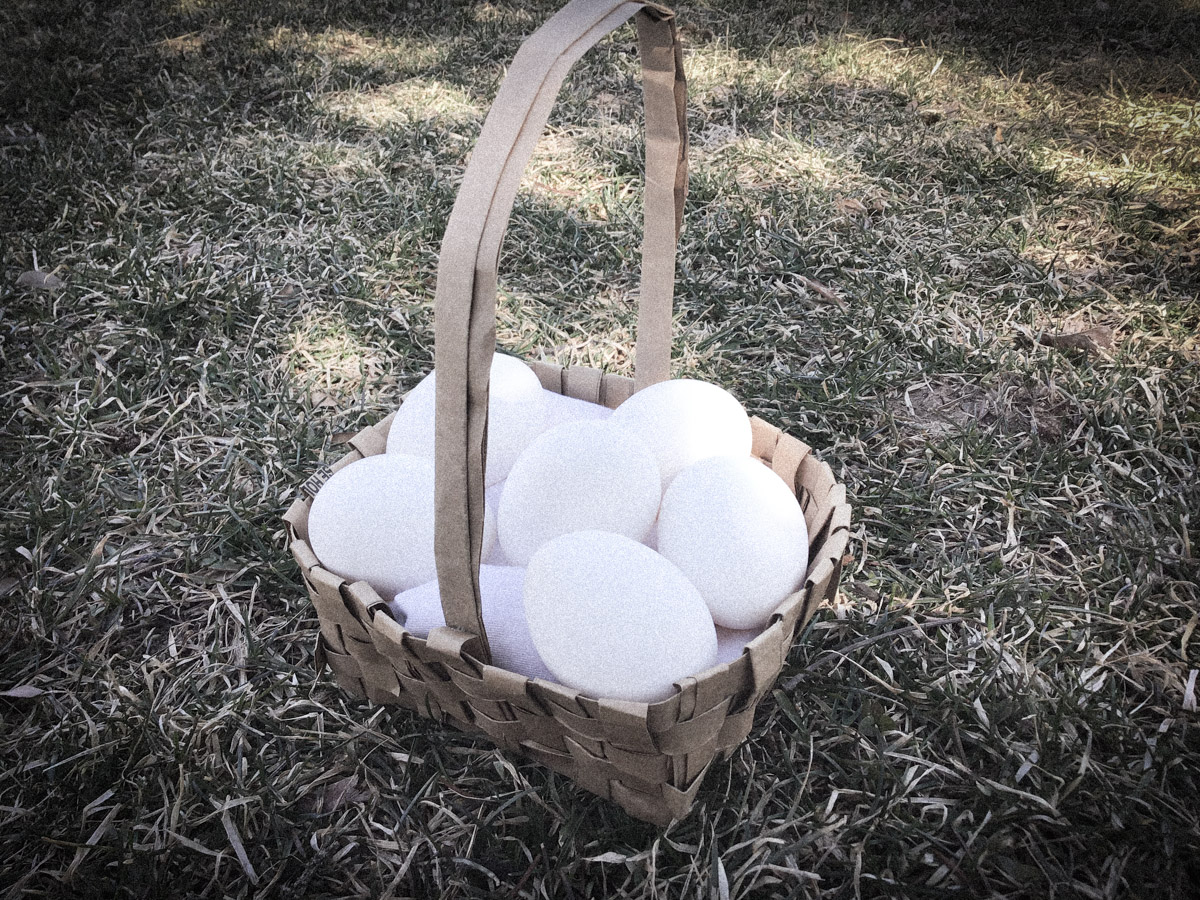
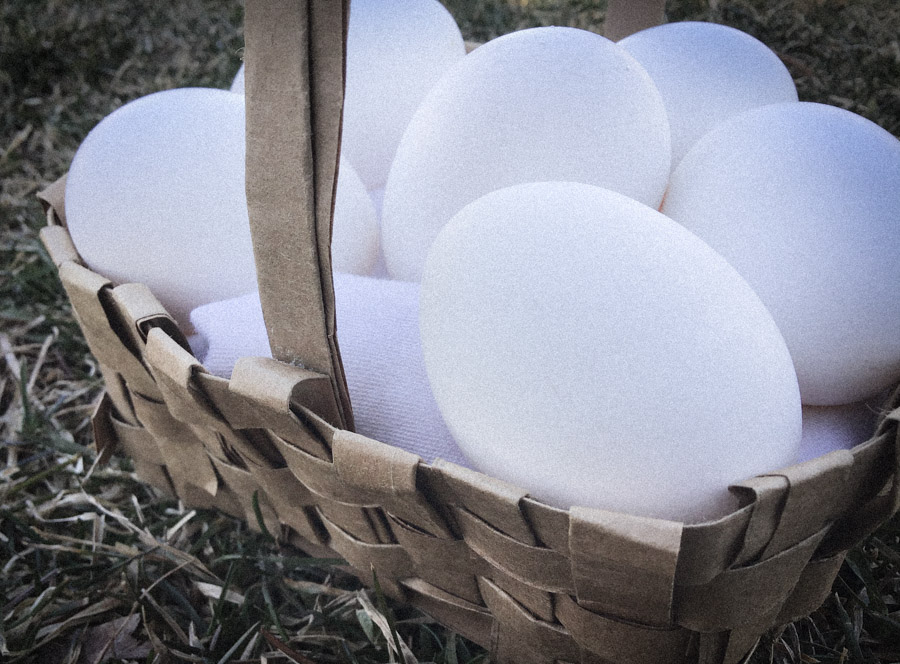
9. Tuck the two ends of the 24-inch handle strip into opposite sides of the basket, working it into the cross strips on the inside. This is mostly a decorative basket of course, but if you want you can staple or glue the places where the handle meets the sides of the basket so that you can carry (slightly) heavier things in it